Save the Day Muffins
I think there must be an unwritten rule that sometime around a year into your first child’s first year of life you become a muffin making maniac. Or maybe that is just me. Gone are the sumptuous chocolate cupcakes or fluffy lemon swirls that graced my island a year ago – instead I am firmly entrenched in trying (albeit unsuccessfully) to make healthy treats for that little someone who has a way of demanding them – especially if they look like cupcakes. As some of you know, ever since Olive’s debut into the world of desserts at 6 months (the cupcake incident), he has dive bombed anything that looks even remotely like a cupcake. Which is why I found myself in the kitchen at 6 AM this morning holding a semi-comatose, smelling-like-puke one-year-old while trying to figure out if I should substitute applesauce for butter in one of Dorie Greenspan’s delicious muffin recipes. I went with the butter. After perusing some “toddler friendly” cookbooks I realized that some things I am quite simply unwilling to do without. Other things, like margarine, just don’t belong in my fridge. Ever.
So these muffins are a little bit healthy. In fact, they are very healthy because they saved my mental health from an almost certain collapse after a really rough week. Between the boys being sick and Oliver starting nursery school it has been demoralizing – at best. But only 5 muffins later – the kitchen was clean, the laundry was (partially) done and I was heading up to the farm to peel some of those perpetual tomatoes for Minestrone.
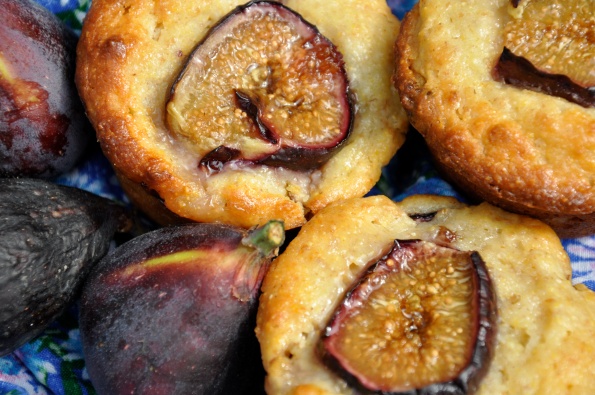
I used fresh figs for these muffins but they are also very good with dried ones or whatever you have on hand. I also made some with dollops of fresh peach jam on top instead of figs and they were divine (woot woot peach season). So go with what moves you and hopefully they will turn out as well as mine!
Mom – O – Meter 4.5/5
These suckers are easy peasy. Like I made them on 1.5 hours sleep carrying a 30 lb toddler under one arm pretty much the entire time. My husband was amazed when he woke up. If you have sold out to extreme lazyness like I have and use cooking spray to grease your muffin tins they take under 10 minutes to get in the oven. You can also use them to dispose of odds and ends and substitute like ingredients to your hearts content. Plus they are moderately healthy and Oliver thinks they are cupcakes.
Recipe
Yield: 12 largish muffins
Ingredients
1 cup enriched wheat flour (or white all purpose)
1/2 cup whole wheat flour
1/3 cup cornmeal
1/2 cup rolled oats
1/4 cup raw cane sugar (you can omit this and add a bit more honey or feel free to use plain white sugar if you have not got any )
2 tsp baking powder
1/4 tsp baking soda
1/2 tsp sea salt or kosher salt
1/4 cup honey
2 large eggs
1 1/4 cups plain yogurt (you can sub a bit less buttermilk in for this if desired)
1/2 cup/ 1 stick of butter
1/3 cup diced dried dates (or other dried fruit, raisins, whatever)
3 diced fresh figs or 1/3 cup diced dried figs (or more of whatever dried fruit you have)
GARNISH: whole figs cut in half and drizzled with honey, fresh or canned jam or basically anything with a bit of sweetness to add to the muffin.
Directions
1. preheat oven to 400 degrees and grease a 12-cup muffin pan. Combine dry ingredients (first eight ingredients) in a bowl and stir to combine. In a microwaveable bowl (I use a large glass measuring cup – it needs to be at least 2 cups) melt the butter and then add the other wet ingredients. Mix them into the dry ones, add the dried fruit and pour into the muffin cups- garnishing as desired.
2. Bake for 16-20 minutes – a toothpick should come out clean with a few loose crumbs. Let cool for around 5 minutes before removing from pans. Enjoy.
Farmers Market
Check out our new page on how you can come and see us at our local Farmers Markets! If you are lucky you may even get to meet Penelope and Oliver as they are frequent visitors!
(almost) flourless chocolate cake
In my family it is somewhat like Christmas; you wait for it all year long, dreaming expectantly of all sorts of sugary delights, talk to everyone you know about it on the phone in anticipation and finally visit several different stores to pick things up so that you are completely ready. And then the long-awaited day arrives and you have barely slept the night before – you wake up as early as possible and rush down the stairs. When you get there it feels too good to be true, like you must be dreaming and as you leave your car and step out onto that field, basket in hand – you think this might just be the best day of your life.
Pick-your-own strawberry time is here again and people all over our area are sporting red moustaches from all the delicious munching that goes on before those berries are weighed. Needless to say, there were two particulariy guilty babies who may have that moustache permanently inked onto their rediculous little faces due to a very successful first trip to the patch.
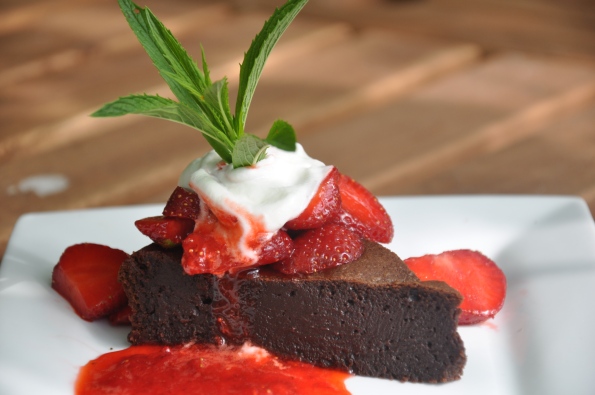
I thought that I would take this occasion to share one of my all-time favorite recipes with you. It is an(almost) flourless chocolate cake that has made the rounds even before I first discovered it at Orangette – and with minimal tweaking can also be a gluten-free flourless chocolate cake (if you want to be trendy, or healthy). It is always a crowd pleaser – and I promised some of my friends almost 6 months ago that I would post it – but with a limitless supply of fresh picked strawberries on deck it is simply divine. .
This is a very simple melt and stir recipe that takes me only about 10 minutes to get into the oven and always pleases everyone. The downside is that it is pretty chocolate heavy so while it is easy to make with a baby, it is not a good idea to feed to a baby. Somehow that does not bother me so much:)
The Recipe
7 ounces (200 grams) best-quality dark chocolate
7 ounces (200 grams) unsalted European-style butter (the high-butterfat kind, such as Lurpak or Beurre d’Isigny), cut into ½-inch cubes
1 1/3 cup (250 grams) granulated sugar
5 large eggs
1 Tbs unbleached all-purpose flour
Directions:
Preheat the oven to 375 and then butter and line a peice of parchment cut to cover the bottom of an eight-inch cake pan.
Melt the chocolate and the butter, then stir in the sugar. After a moment for the chocolate to cool add the eggs one at a time stirring after each addition. Then add the flour, or half as much arrowroot flour to be gluten-free.
Bake for around 25 minutes – the top should be crackly and it should not wobble too much. The time is not always exactly the same so decide how gooey you like it! After the cake has cooled for 10 minutes flip it onto a plate covered with aluminum foil and then back onto its bottom side on another plate.
Serve with fresh strawberries and whipped cream.
Note: I posted this by mistake but the post is not yet done…cake pictures to follow in the next 24 hours as today’s cake is still in the oven and we need to show all the delicious fresh berries in the picture!!!
Cookbook Club – Ina Garten’s Barefoot Contessa Cookbook – March 2011
So… as some of you know we are gearing up for the Farmers Market season, trying out new recipes and perfecting old ones so that we can sell tasty food at the markets when they open at the end of May. Luckily, we chose a great cookbook for the March cookbook club.
We decided to do the Barefoot Contessa Cookbook because she does a lot of catering and sells the type of food that we are hoping to sell this spring. Overall, we loved the book and everyone enjoyed the simplicity of the recipes in comparison to the previous months picks. Though there is a warning that some of the recipes make quite a large amount (the brownies especially could have fed an army).
The Menu
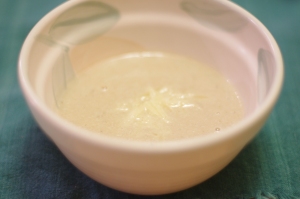
Jeremy – Rosemary White Bean Soup
This was gobbled up before a photo could be taken!
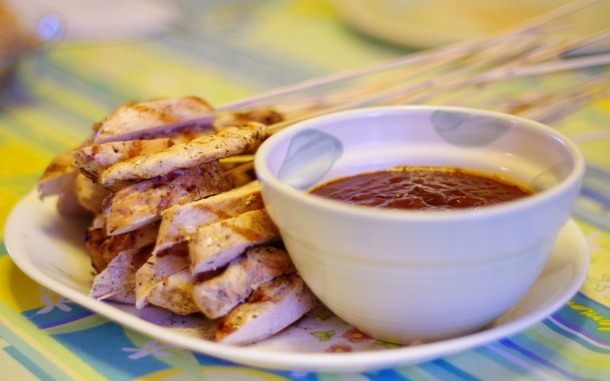
Maressa – Grilled Lemon Chicken with Satay Dip
Susan – Roasted Fennel with Parmesan
Emma – Szechuan Noodles
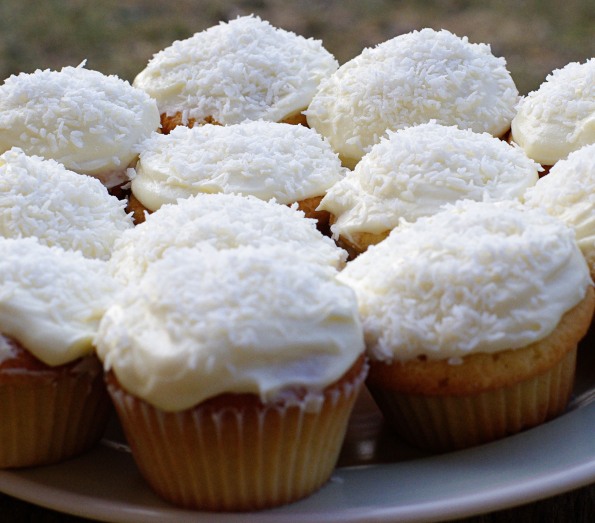
Justin – Coconut Cupcakes
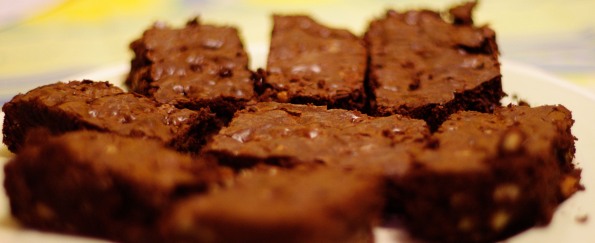
Claudette – Outrageous Brownies
So, in general people really liked this cookbook. The bean soup was simple and the babies loved it! The chicken satay would be wonderful for a party or shower, it was a great idea to cook the chicken in whole breasts and to slice and skewer it afterward, so much better than doing it with slippery raw chicken and this ensured that the chicken remained moist. The noodles were tasty but the we thought the dressing was a bit thick. Everyone loved the roasted fennel and its simplicity really allowed the vegetable to shine. The cupcakes were fabulous!!! We baked the brownies with the supermarket brand of chocolate and I think that came though, they were not “outrageous” but maybe if you used a higher quality of chocolate they would be. All in all we loved the evening of food, friends and laughter.
Again if you are in the area and interested in joining the Cookbook Club please let us know, we are meeting this weekend, either Sunday or Monday.
Springtime Sushi
We have been making a lot of Sushi lately. Where we live we just can’t get it made for us- for a while there was a great little Japanese and Korean restaurant about 20 minutes drive away in Smiths Falls, but now we are back to Ottawa or bust. This was a problem until sometime around last Christmas. I had been making copious amounts of curry and my most hated task was cooking rice. Pretty much every type of rice – including of course, sushi rice. Everyone had told me to get a rice cooker – but it had just never happened until one fateful day at Canadian Tire when I saw them on sale for 14$. Well, my family motto is practically “the more you buy, the more you save” when it comes to sales – so I picked it up and it has become indispensable. I have only two words for you: buy one.
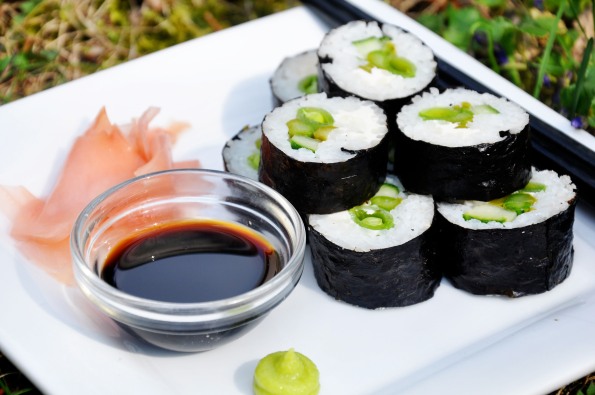
So, sometime shortly after the purchase of my new most valued possession – we stopped complaining about the lack of sushi restaurants around here and started having weekend sushi parties instead. Our most recent one boasted crispy fried crab and mango sushi with cream cheese, coconut shrimp tempura sushi with avacado, and a variety of veggie options, including one that boast local seasonal ingredients. We named this “Springtime Sushi” – and it is an asparagus and snow pea sushi that delivers with a unique taste and a refreshing crunch.
So here it is – our recipe for Springtime Sushi – which can of course be used to make an infinite variety of other sushi’s as well!
I also added a few pictures of Oliver’s first Easter – they were just too cute I had to share. Something about the arrival of baby chicks a few days before Easter just put the cuteness over the top.
Mom O Meter = 3.5/5
Lets face it – sushi is never going to be something that is easy to do with a baby tucked under your arm. It will always take two hands to roll up the sushi, and one recipe is not going to vary much from another. That being said – by making veggie sushi you do not have to deal with raw fish – which is decidedly mom-friendly. Plus, using a rice cooker does make it really easy.
Ingredients
2 cups uncooked sushi rice (short or medium grain sticky rice – the PC sushi rice works well)
one bundle of asparagus spears
roughly one cup of fresh, unshelled sugar snap, snow, or sugar sprint peas
1/2 cup cream cheese
1 package nori
Sushi Su Ingredients
1/2 cup rice wine vinaigre
2 tablespoons mirin or saki (sometimes we omit this)
1/4 cup sugar
*ginger, soy sauce and wasabi for serving
Steps:
1. Rinse rice thoroughly until water runs clear. Put rice into rice cooker and cover with an equal amount of water and cook until done. Meanwhile, combine the ingredients for the sushi su in a small saucepan and cook until the sugar is dissolved.
2. Steam asparagus briefly in order to tenderize it, and then cut each spear into two or more long, thin slices. Destring the peas and cut those if desired.
3. Once rice is finished and while it is still warm pour over the sushi su and mix gently and briefly – do not overmix or rice will become starchy.
4. Lay out your bamboo mat and place a peice of nori onto it with the shiny side down. Cover the bottom 2/3 of the nori with rice, and then place a line of cream cheese across it. Put a few peices or asparagus, some peas and some ginger if desired on top of the cream cheese line (this is where you can have fun and use instead shrimp or crab tempura, mango, avacado, cucumber or whatever you like). Tightly roll up the sushi using the bamboo mat to press firmly as you go.
If you have never made sushi before you may want to read over the Pioneer Woman’s Sushi 101.
Then, when you are all done, you can eat it out in the garden like we did during a rush of beautiful spring weather (clearly we made this over a week ago NOT during the past few days of interminable rain)!
Cookbook Club – Jamie Oliver’s Cook with Jamie – February 2011
Well this comes a little late but not because we didn’t love the book only because these babies are keeping us on our toes and they seem to love getting at the computers leaving the mommies without a chance to sit and write. With this meeting of the Cookbook Club we had a feast!
Michael joined us for the first time and started us off with a first course of gnocchi. It was definitely one of the stars of the night! We would suggest making it over and over as it is easy and delicious. The gnocchi was so light and fluffy and the potato flavour was so delicate, some of the best gnocchi we have ever had. Michael could not find gorgonzola cheese so instead he made a gouda and fresh basil sauce, everyone was licking their plates!
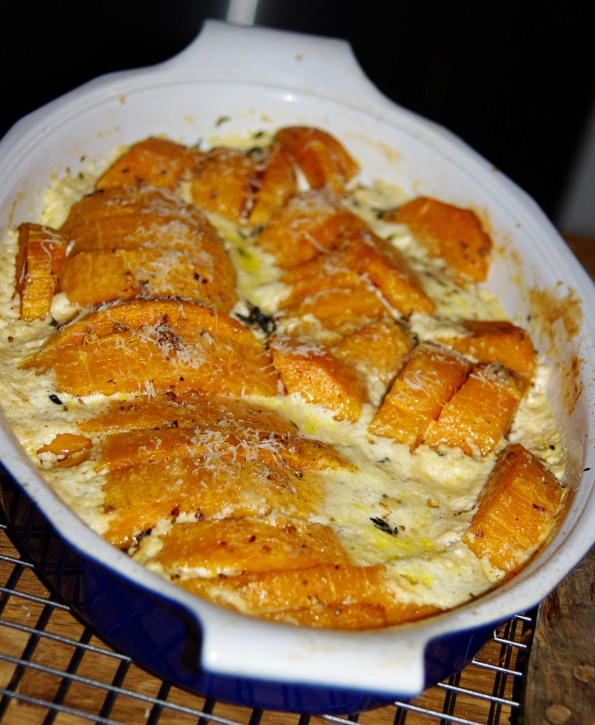
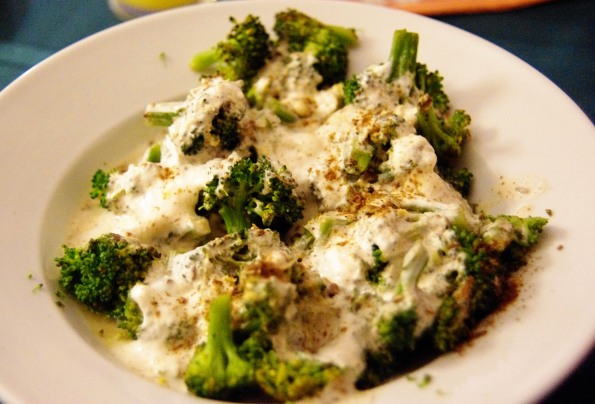
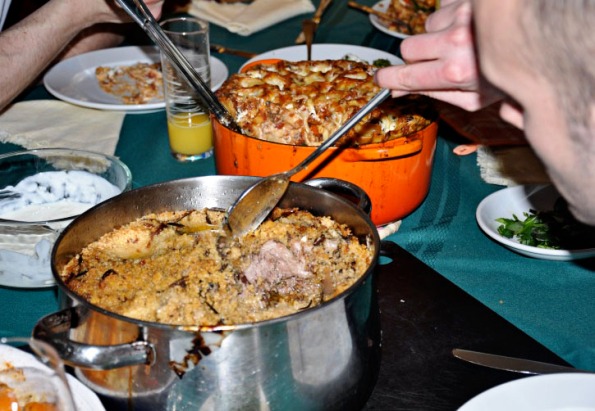
For the main dinner we had Mad Moroccan lamb, Honeycomb cannelloni, Indian-style broccoli with spiced yogurt, and Creamy butternut squash. The lamb was yummy but ended up being way too much work to make again, Claudette was working on it for quite some time as there are so many different steps. The cannelloni was a hit, you can read about it here. The broccoli was delicious and was a great new way to enjoy your green veggies, would be a wonderful addition to any Indian dinner. The butternut squash was great but in following the recipe the cream ended up curdling with the wine shortly after assembling. The main dinner was quite good but we could have fed at least twice as many people as were there. We all enjoyed the leftovers for a couple days!
For dessert we had ‘a rather pleasing carrot cake with lime mascarpone icing’ unfortunately we did not find it pleasing. It was cooked for less time than was suggested and it still ended up being dry, not what you want out of a carrot cake.
Slow Roasted Tomatoes
There are few things you can find in a salad that I detest more than winter tomatoes. At least in this part of the world, so many of them are grainy, pale coloured and tasteless. Every now and then there are exceptions – but upon entering the veggie section of the supermarket in winter I tentatively approach the tomatoes, skeptically looking over the various lifeless varieties before fearfully picking one up to see if it smells, even remotely, like a tomato. Usually, it smells like nothing at all, like cardboard, or worse – the truly foul smell of a winter tomato starting to go sour.
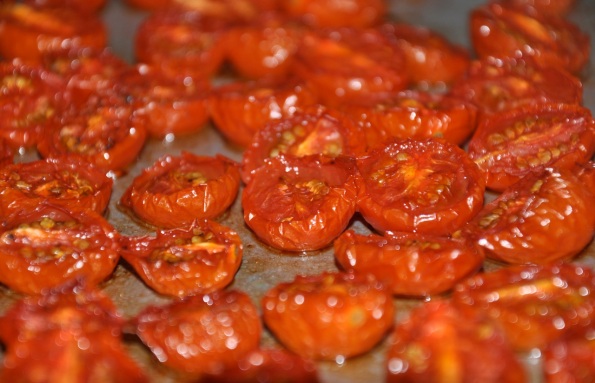
Since Caprese salad time is still far in the future – I thought I would post a simple recipe that turns even the most pernicious of winter tomatoes into succulent, flavour packed goodness. Better yet – it is dead easy and these little gems will keep for a couple weeks in the fridge if you pack them tightly into a mason jar and top it up with olive oil. I use them in pasta, salad, pizza, sandwiches – …they enliven pretty much every dish. I have not done it yet but I think they would be fabulous in a martini as well!
Mom-O-Meter 5/5
They take about 5 minutes to get into the oven if you choose to chop the tomatoes in half or even less if you don’t. There are only three ingredients – two of which I always have on hand (olive oil and sea salt). They are no maintenance while they are cooking and then they are done. Plus they last for weeks (unless your husband eats them with every meal like mine does and then they are gone in a matter of days). There is nothing to lose with this recipe so do it today!!
Slow Roasted Tomatoes
1-2 pints washed cherry, grape or other small tomatoes – this recipe also can be done with larger tomatoes but I prefer the little ones.
2 tablespoons olive oil ( or however much it takes to coat the tomatoes)
sea salt – to taste
1. Preheat oven to 280 degrees. Chop tomatoes into halves. Put tomatoes on a rimmed cookie sheet covered with parchment if you have any (I skipped this step and had to wash the pan but it was not so bad). At this point you can add any fresh herbs or flavour boosters you have on hand like rosemary or whole garlic cloves. Tasty but totally unnecessary – they are great without any other seasoning.
2. Put tomatoes in oven for around 3 hours – if you go longer they will get more dried so it really depends how you like them.
Honeycomb Cannelloni
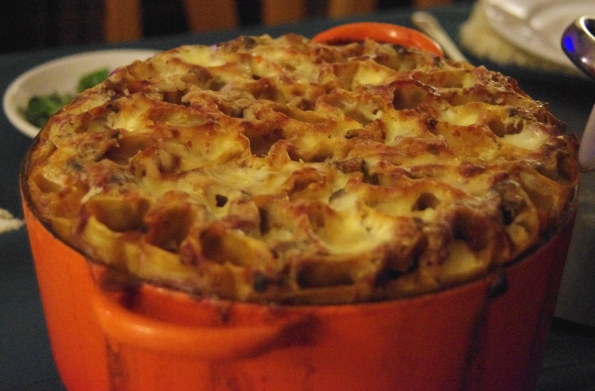
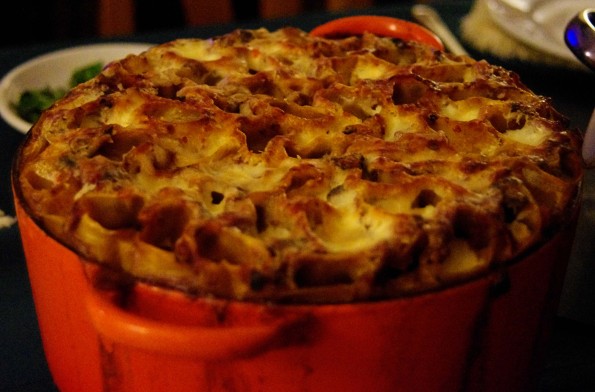
Well I am ready for winter to be over! Just when things were starting to melt they go and get cold and snowy again. With that being said I am not sick of winter food yet. We had our Cookbook Club get together this past weekend and the dish I made was so yummy and fun that I had to share it here right away. The presentation is awesome and if you have a dinner party coming up I highly recommend this dish as it serves quite a few plus the name Honeycomb Canneloni just sounds so good!
All in all this dish was pretty easy to make considering it is canneloni and usually you have to stuff each noodle individually, in this case you do not. With the red sauce you can do any variation really. You could make a meat sauce or even a couple jars of yummy store bought sauce would work. This version was a vegetarian version and was chalk full of a variety of veggies that really came together in flavour. It has mushrooms in it but I even had the mushroom haters loving this dish. Feel free to play with this dish and make it to your liking. The only thing I would recommend it to use the right size of pan to cook it in.
Mom-O-Meter: 4 out of 5
There are a lot of ingredients in the following recipe but you can adapt it to your tastes and time restraints. It truly it delicious and chalk full of goodness!
Honeycomb Cannelloni
Adapted slightly from Jamie Oliver
Ingredients
Red Sauce
a small handful of dried porcini mushrooms (I used the whole small bag they came in)
a few tablespoons of olive oil
3 carrots, finely diced
4 celery stalks, finely diced
1 large red onion, finely diced
1 leek, white and light green parts finely diced
2 cloves of garlic, sliced
3 Portobello mushrooms, finely chopped
5 x 14oz cans good quality plum tomatoes (if using whole pulse lightly in the blender before adding to the sauce)
a large bunch of fresh basil, leaves picked, stalks finely chopped
spinach layer
1 1/2 lb fresh spinach
whole nutmeg
white sauce
1 cup light cream
17 1/2 fl oz crème fraiche (I used 500ml)
4 good quality anchovies in oil, drained and finely chopped (I could not find any so I omitted them)
a handful of grated Parmesan cheese (I used about a cup)
to assemble
sea salt and freshly ground pepper
Parmesan cheese, freshly grated
1lb 2oz cannelloni tubes (I used 2 and a half packages of 250g pasta)
olive oil
a casserole pan that it approximately 8 inches in diameter and 5 inches deep (I used a dutch oven, in which the presentation looked lovely but it looks like Jamie used a metal pot)
Place the dried porcini in a bowl just cover them with boiling water. Leave them to soak for 5 minutes. Meanwhile, put a large heavy bottomed pot over medium-high heat and add the olive oil, carrots, celery, onion and leek. Cook for 8 to 10 minutes, stirring occasionally, then add the portobello mushrooms. Add the porcini, reserving the liquid, to the pan and cook for another 5 minutes until the vegetables have softened. Strain the porcini liquid and add this to the pot with about a half cup of water. Allow the liduid to reduce slightly, then add the tomatoes and the basil stalks. Season with salt and pepper, and bring to a boil. Reduce heat and simmer for roughly 45 minutes Jamie says that he has a thick ragu, after an hour my sauce was still quite liquidy but it did not seem to matter in the end as the noodles absorb the liquid. Tear in the basil leaves.
Preheat the oven to 375°F.
In a saucepan, heat a splash of olive oil and add the spinach, stir, then leave to wilt down. Season with salt, pepper and a grating of nutmeg. Put aside.
To make the white sauce mix the cream, crème fraiche, anchovies (if using) and grated parmesan cheese. Adjust seasoning to taste.
To assemble, get the casserole pan out and spoon in some of the white sauce so that it measures about half an inch. Sprinkle with parmesan cheese and top with the spinach. Ladle in half of the red sauce and stand your cannelloni tubes in it. Press the tubes down gently with the palm of your hand, the sauce should come up and half fill the tubes. Spoon over the rest of the red sauce, smoothing it down into the tubes (not all of my tubes were filled to the top). Pour over the remaining white sauce, sprinkle over more grated parmesan, drizzle with olive oil and bake in the preheated oven for 45 minutes until golden and bubbly. Enjoy!
Cookbook Club – Dorie Greenspan’s Around My French Table – January 2011
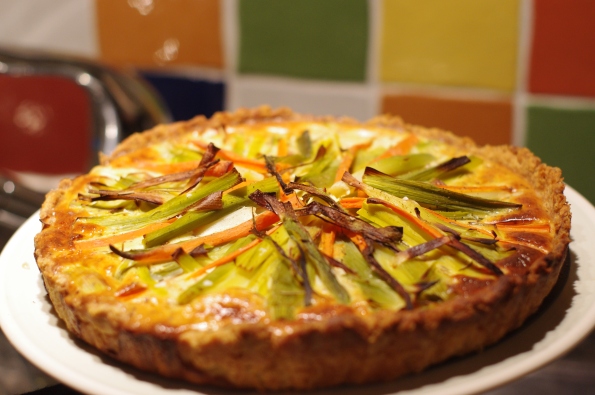 Wow what a success!!! Our first ever Cookbook Club soiree has gotten us hooked! Everyone in attendance agreed that this was a brilliant idea and we all had so much fun picking a recipe and making it. It was wonderful to be able to have a full meal that was made out of one cookbook, with an appetizer, soup, salads, savory tart, and delicious dessert.
The Menu
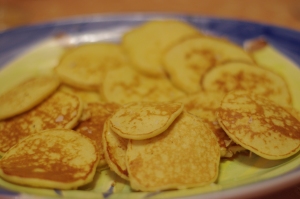
Matafan with Creme Fraiche and Assorted Chutneys
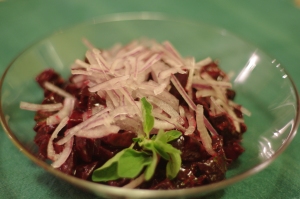
Gerard’s Mustard Tart with Beet and Carrot Salads
The Verdict
We all loved the meal – but some of us loved the cookbook more than others. In general – the experience of the person cooking the dish was directly proportional to how much they liked the book. Claudette – who has by far the most culinary experience – gave the book 10/10 despite having a more time consuming dish to prepare. All of the dishes turned out well – but some were a little bit fussy for the overall product. In some recipes there is an assumption of general competence that not everyone has – and in others extra steps that may or may not make a big difference in the end product. Overall – we highly recommend this cookbook for the food enthusiast and really anyone with a bit of time to fuss around – but maybe not for everyone. Obviously – for those who have spent time in France it holds special appeal – and so our group really enjoyed all the little anecdotes and tips!
Click to find out more about the Cook-Book Club or click the link at the top of the page.
Next Up: This Sunday we are going to be doing our February selection – Cook with Jamie Oliver. Come on out and join us if you live in the area and are interested in whipping something up and tasting lots of recipes from the book!
Babies enjoying the evening of food and fun!!!
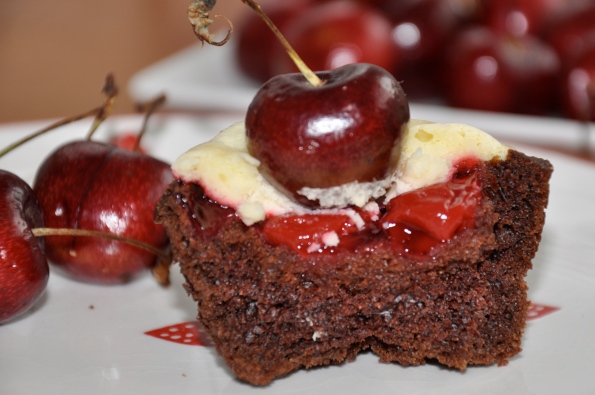
Cherry Chocolate Cheesecake Cupcakes – The 4 C’s
These little wonders will woo your valentine and everyone else you give them to! They are basically an interpretation of the standard black bottom cupcake – a dense chocolately base topped with a cheesecake layer studded with chocolate chunks. The difference lies in the layer of cherry filling tucked into the cheesecake layer that gives them a cute Valentine’s day twist. It also lightens them up a bit – adding a layer of tart to an otherwise quite sweet cupcake. I have used both fresh pitted cherries and cherry pie filling with equally tasty results.
The great thing about these cupcakes is they are perfect to take in to school or work because they are easy to transport – as long as you don’t go overboard on the cherry like I did and decide not to put them in muffin cups. Then they turn into trifle (but nobody seemed to mind). On my second go I made the same cupcakes with a tad less cherry and used muffin cups – and they were perfect. Of course you should experiment with the toppings and fillings that you like best – I put chunks of Lindt chocolate in some of them and they were over the top delicious.
Mom-O-Meter 4/5
These cupcakes make a fair few dishes – but can be done in steps and do not take very long to make. They last for a few days without much fuss – which is nice. They also require no icing – which is good because it is one less step and also less mess for little munchkins to eat! Also – they take well to adaptation – because there was no way I was going out in the freezing cold weather to get buttermilk (yogurt worked just fine)!
TIP: Make sure your cream cheese is nice and soft to avoid lumps!
Cherry Chocolate Cheesecake Cupcakes – The 4 C’s
This recipe is an adaptation from David Lebowitz (the cheesecake portion) and the Pioneer Woman (the chocolate cake part).
Yield: 24-30 cupcakes
Cheesecake Layer
2 packages cream cheese at room temperature
2 eggs
2/3 cup granulated sugar
4 ounces chocolate chips or chopped chocolate
1 can of cherry pie filling or 1.5 cups fresh pitted cherries
Chocolate Cake Layer
3 cups sugar
3 cups all-purpose flour
½ teaspoon salt
¾ cup buttermilk
3 whole eggs
1 ½ teaspoons baking soda
2 teaspoons vanilla
3 sticks (1.5 cups) butter
6 heaping tablespoons cocoa powder
1 ½ cups boiling water
Directions:
- Preheat the oven to 350 and line 24 muffin cups.
- Make the cheesecake layer by beating the cream cheese until smooth and then adding the sugar followed by eggs and add the chocolate at the end. Set aside.
- Make the chocolate cake layer: combine the sugar, flour and salt in a large bowl. In a small bowl combine buttermilk, eggs, vanilla and baking soda. In a small saucepan melt butter, add cocoa and allow to bubble for a minute before adding hot water. Pour over flour mixture and mix to combine and allow for it to cool a little bit. Then add liquids and stir just until colour is uniform.
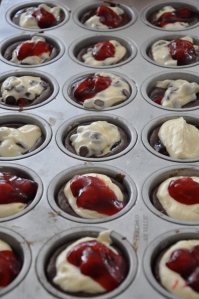
- Pour chocolate mixture into muffin cups, followed by 1-2 tablespoons of cheesecake mixture and as much of the cherry as you see fit. You can also put the cherry in first if you prefer – I mixed it up and switched back and forth to get different looking cupcakes.
- Cook for 23-25 minutes, remove from oven and let sit for 5 minutes. Then pop out of the pan and onto a cooling rap.
NOTE: These cupcakes can be left out for a couple days – however they are just as good (some people would even say better) if refrigerated.
Oliver and Jeremy’s happy dance once the cupcakes were done! Ollie has somehow discovered that cupcakes are something special (maybe because I am a bad mom and cracked and gave him a piece) and now he divebombs anything that remotely looks like a cupcake.
